Sunday, March 22, 2015

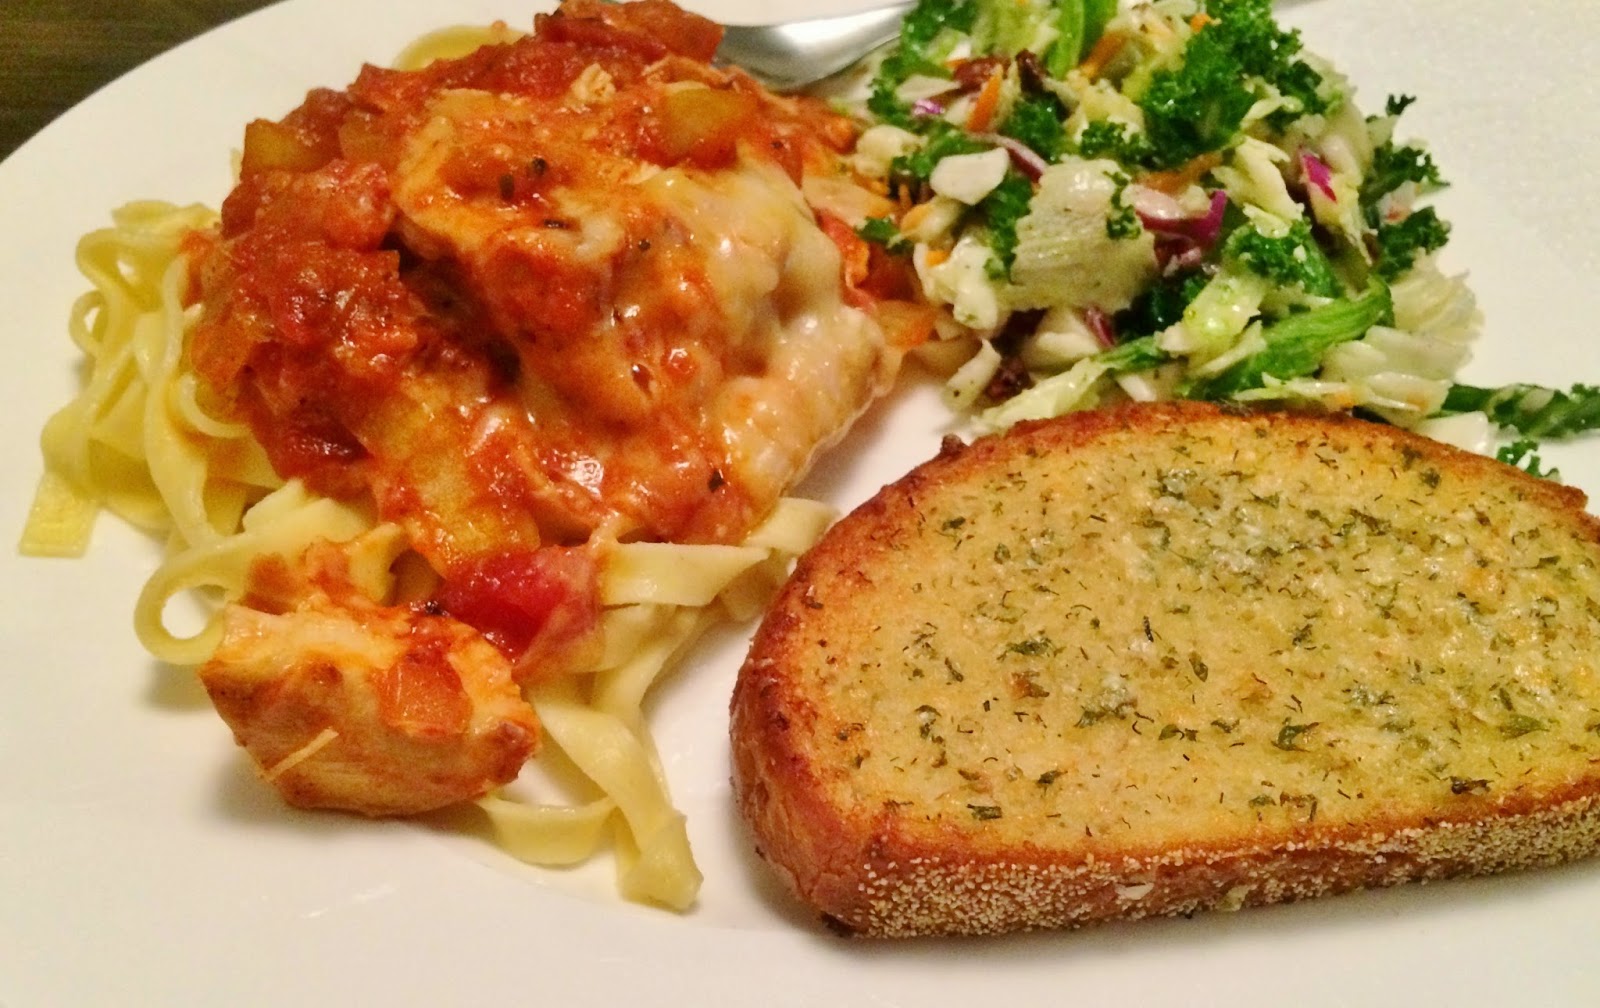
Kate’s Crockpot Chicken Parmesan


I am always on the lookout for a great crockpot recipe. My sister told me about this recipe she has been making for a while now that her husband loves! If a man loves it then I knew it had to be a good one!


This simple recipe is absolutely delish, I loved it too!

I browned up the chicken prior to putting it in the crockpot because that is what my sister told me to do but if you were in a hurry you could skip this step, I am sure it would be just as good!

What you need,

2 large chicken breasts cut into 4 pieces each
1 tbsp. olive oil
½ tsp. garlic powder
½ tsp. seasoning salt
¼ tsp. fresh ground pepper
1 yellow onion, cut into a large dice
1 jar of your favourite spaghetti sauce (I used Classico Roasted Tomato & Garlic)
½ cup Parmesan cheese, grated
1 cup mozzarella cheese, grated

Pasta for serving

In a large skillet heat the oil over medium high heat.  Season the chicken breasts on both sides with the garlic powder, seasoning salt and pepper. Brown the chicken on both sides for 2-3 minutes per side until golden brown, but not cooked through.

In the crockpot stir together the jar of sauce and the onion.

Place the browned chicken pieces into the sauce and use a spoon to make sure all the pieces are covered with the sauce.

Place the lid on the crockpot and cook for 5-6 hours on low heat. You could do it on high for 3-4 hours.

The chicken should easily shred apart with a fork when it is done. The actual time will depend on your crockpot, mine is small and older so it takes the full 6 hours!

When the chicken is cooked, take the lid off the crock pot and stir in the Parmesan cheese. Then sprinkle the mozzarella cheese over the top and put the lid back on to let the cheese melt.

Serve over the pasta of your choice, I used fettuccine, but anything you like would work.


I added a Caesar salad and some herb toast and it was the perfect dinner.

Thanks Kate for a winner of a dinner! I will be making this one again for sure‼

Jen

Recipe from my sister Kate

Tuesday, March 17, 2015

Chewy Peanut Butter Breakfast Bars with Almonds & Raisins


I loved these breakfast bars so much that I made them again! This time I used almonds and raisins. They were amazing!


What you need,

¼ cup butter
¼ smooth peanut butter
½ cup honey
2/3 cup brown sugar
3½ cups oats, I used quick cook because it is what I had
2 cups rice cereal
1 tsp. vanilla extract
¾ cup raisins
¾ cup raw almonds, chopped into rough pieces
½ cup mini semi-sweet chocolate chips

Like a 9X13 inch baking pan with parchment paper, spray lightly with non-stick spray.

In a large bowl stir together the oats, rice cereal, raisins and almonds.

In a small saucepan combine the butter, peanut butter, honey and brown sugar. Heat over medium until the mixture comes to boil, stirring occasionally.
Reduce the heat and simmer for 3 minutes. Remove the mixture from the heat and stir in the vanilla.

Pour over the oat mixture and stir to combine well.  Press the mixture evenly into the pan and sprinkle with the chocolate chips. Press the chips lightly to make them stick.

Cool in the fridge for an hour or 2 before cutting into bars.  I got 12 bars.  I wrapped them each in saran wrap then put them all into a large zip top bag. I kept them in the fridge until I was ready to toss them into my lunch bag. 


Both my in house taste tester and I both love taking one of these bars to eat mid-morning at work. They are so easy and you have to do is grab one and go.

I hope you all love these tasty bars as much as I do!

Jen

Sunday, March 15, 2015

Homemade Sheet Pan Pizza


I love pizza, any pizza really. I could easily eat it once a week, or twice even!

One of my favourite versions is homemade! We used to have it as kids, and my parents always made it on a sheet pan. The only time I ever had a round pizza was if we ordered in.

This recipe has adapted a lot over the years. My sister Kate really nailed down how to get a perfectly light and crisp crust! I always always always use her method and my pizza is perfect every single time!

What you need,

1 cup warm water
1 tsp. granulated sugar
1 tbsp. instant yeast (or one package)
2 tbsp. vegetable oil
1 tsp. salt
2½ cup all purpose flour
1 tsp. Italian seasoning, optional

In a large bowl, stir together the warm water and sugar. Sprinkle the yeast on the top and let the mixture sit for 5 minutes.

Add the vegetable oil and salt, give it a quick stir.  Add the flour and Italian seasoning if you are using it and stir to combine, I use a fork until it is just mixed, then I use my hands. Knead the dough a few times and make a nice ball. Rub oil over the dough and in the bowl.


Place the dough in a warm place for an hour. I always heat my oven to 200 degrees then shut it off before I start making the dough. That way it will be a nice warm place for the dough to rise. The dough will double in size.


Rub oil liberally over a sheet pan, be sure to give it a good coating, don’t be afraid!  Dump the dough onto the pan and use your fingers to spread the dough out to the corners.  Now here is the secret, put the pan back in the warm oven to let the dough rise a second time for 30 minutes. It is this second rise that is going to give you a perfectly airy crisp crust!


After the second rise, gently use the tips of your fingers to make sure the dough is all the way to the edges of the pan.
Top with whatever ingredients float your boat! I tend to lean toward ham, pineapple and mushroom! Don’t skimp on the cheese‼


Heat your oven to 425 degrees‼ A hot oven is the second trick!
Bake the pizza for 10 minutes on the lowest rack. Spin the pizza around and bake for another 10 minutes until the crust is golden and crisp. 

Now I like to brown up the cheese so I turn on the broiler and move the pizza to the upper rack. I let it broil for 3-5 minutes unlit the cheese is super bubbly and starts to brown.


Remove the pizza from the oven and let it cool for 5 minutes before trying to cut it. 

If there is any pizza left over cool it on a rack and store in layers between wax paper in an airtight container.


If you want to reheat your pizza my suggestion is to do it in the oven.  Heat the oven to 400, place your left over pizza on a sheet pan and cook for 8-10 minutes until hot! This way your crust stays crisp!

NOM NOM NOM‼

PIZZA‼ It is what’s for dinner, and if it’s not it should be‼

Enjoy!

Jen

Recipe tricks from my lovely sister Kate!

Sunday, March 8, 2015

Angel Sugar Cookies


Happy Time Change Day! Not that I love this whole time change thing. I grew up in Saskatchewan, we don’t change time there, we stay on daylight savings time, all year long!


I decided that since we are losing an hour today and it almost Spring we all deserve a cookie, or 6!

These simple sugar cookies are amazing! So easy and so very good. They are crisp on the outside and super chewy on the inside.


The cream of tartar gives these cookies a really nice little tangy taste, which I love.
And they are super cute and Springy and all I had to do was shake on some colored sanding sugar! Easy Peasy!


What you need,

1 cup butter, at room temperature
1 cup vegetable oil
1 cup granulated sugar + plus a little extra for rolling
1 cup powdered sugar
1 tsp. vanilla
2 large eggs
4 cups + 2 tbsp. all purpose flour
1 tsp. baking soda
1 tsp. cream of tarter
1 tsp. salt (I used salted butter so I left the salt out, as usual!)
Colored sanding sugar or sprinkles, optional

In the bowl of a stand mixer combine the butter, oil and both sugars. Beat until smooth. Add the eggs one at a time until well incorporated. Then add the vanilla.  Slowly add the flour, baking soda, cream of tartar and salt.  Mix until everything is fully combined.

Cover the batter with plastic wrap and refrigerate for 2 hours or longer.

When you are ready to bake the cookies, heat the oven to 350 degrees. Line a baking sheet with a silpat mat and set aside.

Scoop a heaping tablespoon of dough at a time and roll into a ball.
Place the dough balls on the prepared pan. Flatten each ball a little but using a small glass with a flat bottom. Butter the bottom of the glass then dip it into the extra sugar and press each ball lightly. Sprinkle on your sanding sugar or whatever you like.

Bake the cookies for 8-10 minutes until they are very lightly browned on the bottom and just set. Let the cookies cool on the pan for 5 minutes before transferring to a wire rack to cool completely.

Store the cookies in an airtight container for up to a week.
These cookies freeze really well too, not that you will have any left to freeze, they are that good!


There you go, pretty little cookies to help you get over the fact that you lost an hour of sleep today! On a high note at least it won’t be dark when you leave work anymore!

Happy almost Spring!


Jen


Recipe from The Pioneer Woman


Wednesday, March 4, 2015

OMG Best Crockpot Chicken Ever!


I have seen this recipe ALL over the Pinterest! It seems like everyone has made it, so I thought it was time I gave it a try.

It claims to be the BEST ever, it is really very good, I don’t know about best ever. but it is a cinch to make, which is awesome, for sure one I am going to keep on file.


I am going to give you the original recipe, this is how I made it, but I am going to give a few tips at the end that I am going to do next time, I think it will make it even better‼


What you need,

2 large boneless skinless chicken breasts cut into 2 inch pieces
1 can condensed cream of chicken soup
1 packet dry ranch dressing mix
1 packet. dry Italian dressing mix
1 8oz block cream cheese, cut into cubes

In a slow cooker combine the soup, the ranch and Italian dressing packets and the cubed cream cheese. Stir to combine. Add the chicken and stir to coat.

Cook on low for 4-6 hours. I stirred the mixture twice during cooking, about 3 hours in and about 1 hour before it was done. This helped smooth out the cream cheese.

Serve over noodles or rice with a nice salad.


Like I said this chicken was really good. I was a bit concerned that it called for the whole packet of both the ranch and Italian dressing. I felt like it might be too strong. I was right; it was a little overpowering, and a bit salty.  Next time I am going to use a tablespoon of each seasoning mix instead of the whole package, I think this will be plenty of spice.
Also the mixture ended up being very thick, which was fine but it was a bit rich. I think adding about ½ cup or so of chicken broth or even lower fat milk at the beginning of the cooking would help thin the mixture out a bit.

Other than that it was really really great! I love that I can get it ready the night before then right before running off to work I can toss it in the slow cooker and when I get home dinner is all ready, you can’t go wrong with that!

Enjoy!

Jen

Recipe from all over Pinterest!