Monday, March 31, 2014

Enchilada Casserole

Taco Tuesday with a twist. Say that 10 times fast…


This hot beef filled casserole is fantastic. It takes no time to make and it tastes great!


What you need,

1 lb. ground beef
1 tsp. homemade taco spice
1-284ml can enchilada sauce
1 cup salsa
6 flour tortillas
2 cups corn, fresh or frozen
4 cups sharp cheddar cheese, grated
Sour cream for serving

Preheat the oven to 350 degrees. Spray an 8x8 inch baking dish lightly with non-stick spray and set aside.

In a large skillet over medium high heat cook the ground beef until no longer pink and well browned. Drain off any excess fat.

Sprinkle on the taco spice and stir around to combine. Add in the enchilada sauce and salsa.  Stir in the corn.

Layer the tortillas in a single layer on the bottom of the prepared pan.
Cover the tortillas with 1/3 of the beef mixture and 1/3 of the cheese. Continue layering the tortillas, beef and cheese to create a total of 3 layers.

Bake uncovered for 30-40 minutes until hot and bubbly.

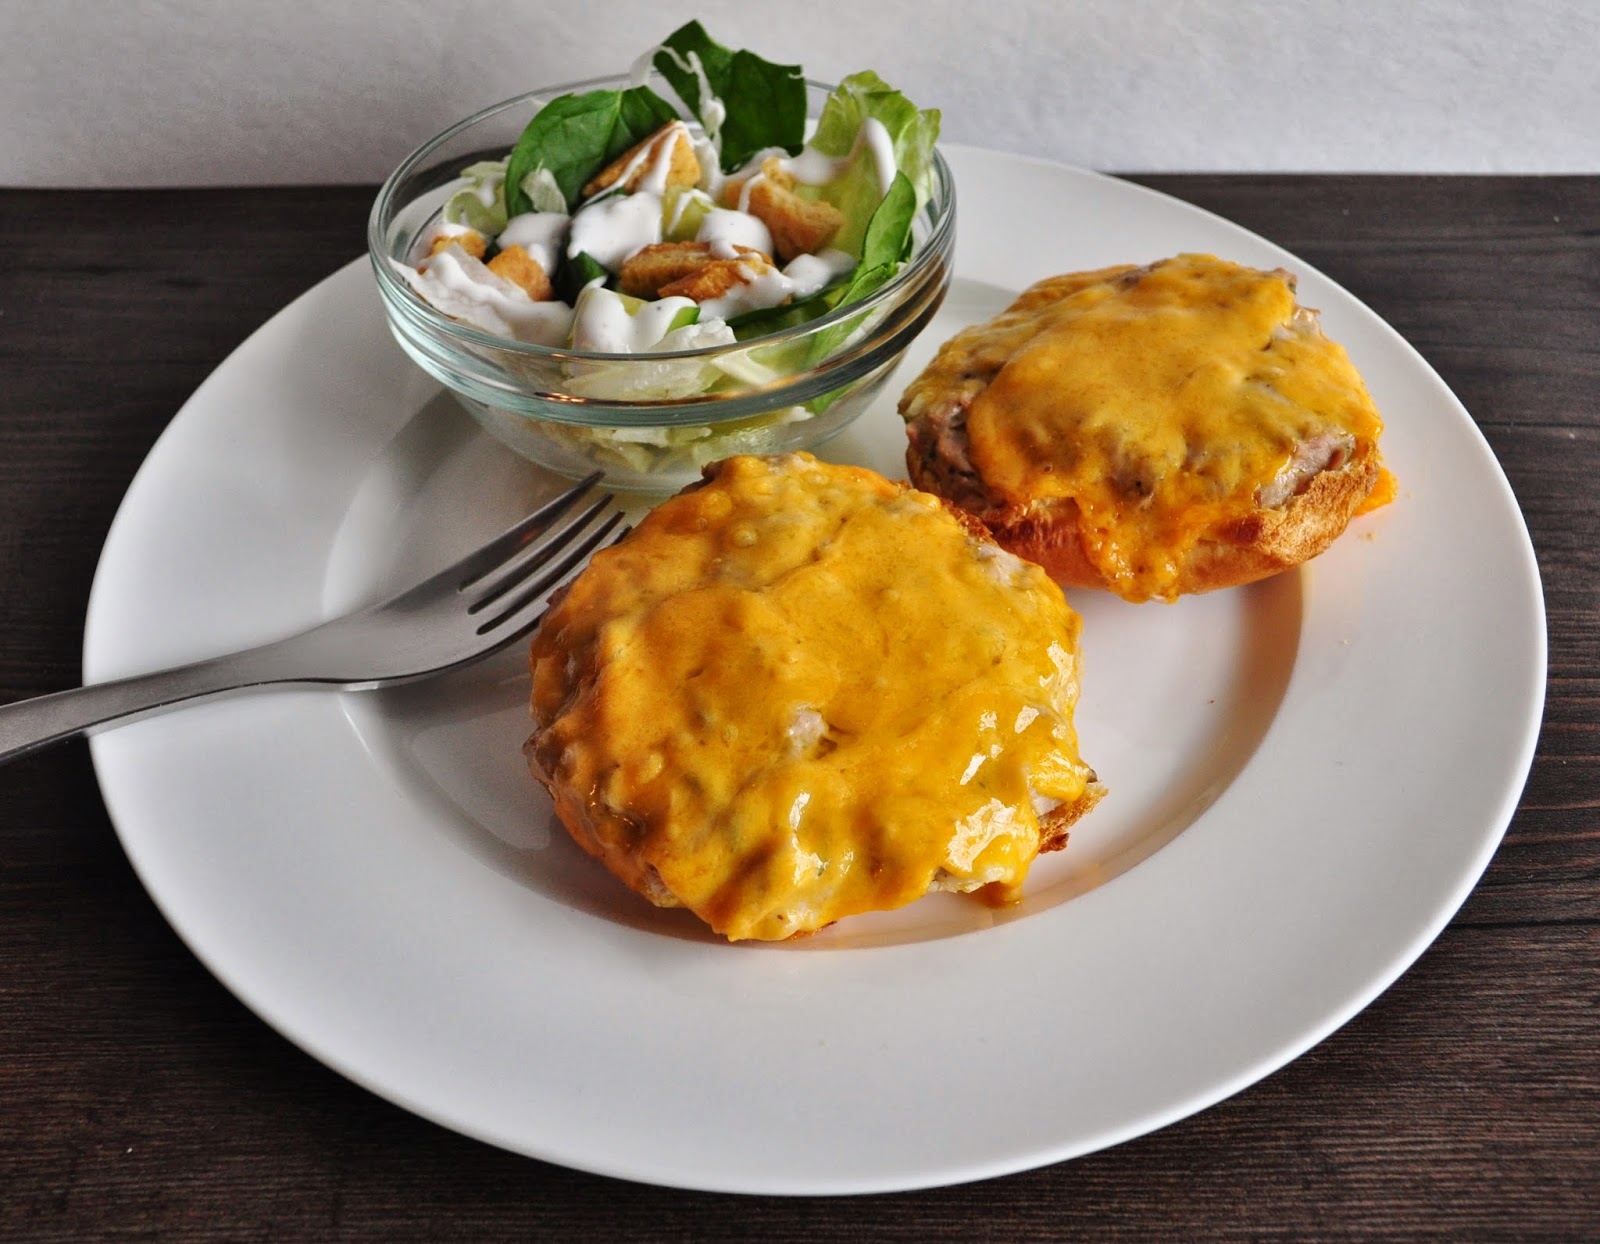
Serve with a dollop of sour cream and a nice side salad.


We really enjoyed this Taco Tuesday twist! It would be great with the addition of some black beans or some chopped jalapeno.

You could top it with some shredded lettuce and chopped tomato instead of making a salad if you wanted, it would be wonderful!

Enjoy!

Jen


Recipe adapted from Taste of Home

Sunday, March 30, 2014

Thai Chicken Tacos

I am totally obsessed with Thai style food right now. I crave it all the time. I think it is my new soul food. I just can’t get enough of the salty, sweet, sour, crispy awesomeness!


These Thai Chicken Tacos are so great. All the flavor of traditional Thai food but stuffed into a tortilla, so so good!


What you need,

2-4 boneless skinless chicken breasts cut into thin strips
½ cup brown sugar
1/3 cup rice wine vinegar
1/3 cup tamari
¼ cup fish sauce
2 tbsp. sambal oelek (chili paste with garlic)
2 tbsp. sriracha
2 tbsp. fresh ginger, grated
2 cloves of garlic, minced

For the peanut sauce,
¼ cup peanut butter
3 tbsp. brown sugar
2 tbsp. tamari
2 tbsp. fresh lime juice
1 tbsp. sambal oelek
1 tbsp. fresh ginger, grated
1 clove garlic, minced
1-2 tsp. sriracha (make it as hot as you like it!)

For the tacos
8-12 small corn or flour tortillas
2 cups shredded red cabbage
1 cup carrots, julienned
¼ cup red pepper, julienned
½ cup cucumber, thinly sliced, stir a splash of rice wine vinegar, a pinch of salt and a tsp. of toasted sesame seeds to make a quick pickle
Fresh parsley or cilantro leaves
Green onion, thinly sliced

Start by making the marinade for the chicken. In a bowl whisk together the brown sugar, rice wine vinegar, tamari, fish sauce, sambal oelek, sriracha, ginger and garlic. Pour over the chicken and stir well to coat. Marinate in the fridge for several hours or overnight.

Make the peanut sauce by whisking together the peanut butter, brown sugar, tamari, lime juice, sambal oelek, ginger, garlic and sriracha until smooth.
You can make the sauce ahead of time as well and keep it in the fridge.

Cook the chicken in a non-stick pan over medium high heat for 5-6 minutes until brown and crisp and cooked through. Remove the chicken to a plate.

Warm the tortillas in a dry skillet for 30 seconds.

To assemble the tacos pile on a little of the chicken, red cabbage, carrots, red peppers, cucumber pickle, parsley or cilantro or both if you are feeling crazy and green onion.

Drizzle the peanut sauce over the top of each taco.


You are going to love these tacos. I want to eat them every day!
Yum Yum!

Enjoy!

Jen

Recipe adapted from Mountain Mama Cooks


Friday, March 28, 2014

Favourite Things Friday Vol 70 - Chicago Mix Popcorn

How can it be Friday already… Man this has been a fast week; sometimes I wish time would just slow down a little.

If you are looking for a killer snack I have one for you. This GH Cretors Chicago Mix Popcorn is TO DIE FOR‼!


It is half cheese flavored popcorn and half caramel corn. I love the salty sweet combo, it is a perfect mix.


I really like to take 1 of each flavor and eat them at the same time.
Snack perfection!


I hope you all have a fabulous weekend!

Jen


By the way the GH Cretors people have no idea who I am, I just love their popcorn!

Wednesday, March 26, 2014

Crispy Baked Chicken Parmesan

This recipe is an oldie but a goodie. My parents used to make it when I was a kid.


I had to call my mom twice to make sure I had the recipe right, it just seemed too simple. It is amazing how much flavor some soda crackers and a handful of Parmesan cheese can have. I guess sometimes less is more!


What you need,

4-6 bone in skin on chicken thighs, trimmed of any excess fat
1 sleeve of soda crackers, about 24
1 cup grated Parmesan cheese
1 tbsp. dried parsley
2 eggs, lightly beaten
1 cup all-purpose flour
Salt and Pepper

Heat the oven to 400 degrees. Set a wire rack in a large baking sheet and set aside.

Place the crackers into a large zip lock bag. Crush to fine crumbs with a rolling pin.  Add the grated Parmesan cheese and the parsley to the bag and shake to combine.

Set up a dredging station, place the flour in a shallow pan, put the beaten eggs in a shallow dish then place the crumb mixture onto another plate.
Season both the flour and egg with salt and pepper.

Pat the chicken thighs dry with paper towel. Season both sides with salt and pepper. Dredge the chicken into the flour then the egg then press into the crumbs to coat well. Place the coated chicken on the wire rack.

Bake the thighs for 40-45 minutes or until brown and crisp and cooked through.

Serve with some buttermilk mashed potatoes and some fresh steamed veggies.


This chicken was better than I even remembered it being. It is super crunchy and it has so much flavor. Using the thighs keeps the chicken moist and tender.

Absolutely delish!

Enjoy.

Jen


Monday, March 24, 2014

Blueberry Muffins

I can't believe I have been blogging for over 3 years and I have never posted a blueberry muffin recipe. They are a classic.


I have made quite a few blueberry muffin recipes but this one was by far my favorite. They are tender and moist and full of fresh plump berries. As a bonus they are topped with sweet and crunchy coarse sugar.


What you need,

3 cups all-purpose flour
4 tsp. baking powder
½ tsp. salt
1 tsp. ground cinnamon
2 eggs
1 cup granulated sugar
1 cup buttermilk
½ cup canola oil
1 tsp. vanilla
1½ cups fresh blueberries (you could use frozen)
Coarse sanding sugar for topping

Heat the oven to 425 degrees. Line a muffin tin with paper liners and set aside.

In a medium sized bowl whisk together the flour, baking powder, salt and cinnamon.

In a separate bowl whisk the eggs until lightly beaten. Stir in the sugar and whisk to combine. Stir in the buttermilk, canola oil and vanilla.

Add the dry ingredients to the wet and fold together gently until just combined. Do not over mix!
Gently fold in the blueberries.

Divide the batter between the prepared muffin cups and sprinkle the tops with coarse sanding sugar.

Bake at 425 for 5 minutes, then turn the oven down to 375 and continue to bake for 12-14 minutes until muffins are lightly browned and a toothpick comes out clean.

Cool the muffins on a wire rack.
Store the muffins in an airtight container for 3 days, or they freeze really well too!


So there you have it, finally after 3 years a wonderful blueberry muffin recipe. Make them, eat them, you will love them!

Jen


Sunday, March 23, 2014

Slow Cooker Roast Beef and Gravy

I love my slow cooker. The set it and forget it mentality really works for me!

This roast is amazing, it has so much flavour and it makes its own gravy!
How can you go wrong?


What you need,

1 envelope of Onion Soup Mix
2 cans Cream of Mushroom Soup
1¼ cups Water
1 tsp. fresh cracked black pepper
1 tsp. garlic powder
1 tbsp. Worcestershire Sauce
1 tbsp. vegetable oil
1 4-5lb. roast beef
Salt and Pepper

In a large skillet heat the vegetable oil over medium high heat.
Pat the roast beef dry with paper towel and season well with salt and pepper.
Brown the roast on all sides in the hot pan; it will take 3-4 minutes per side to get a good brown crust on it.

Transfer the meat to your slow cooker.

Whisk together the onion soup mix, mushroom soup, water, pepper, garlic powder and Worcestershire sauce.
Pour over the roast and roll it around to coat it well.

Cook on low in your slow cooker for 7-8 hours.


This beef was so moist and juicy. The gravy is to die for! Serve with some smashed potatoes and a side of crispy veggies and you have yourself a wonderfully delicious classic dinner.

Jen


Recipe adapted from Canadian Living

Friday, March 21, 2014

Favourite Things Friday Vol 69 - Lemon Cucumber Candle

Happy Friday people! It is finally spring, hooray!!
I am dying for the longer days, the warm sun, pretty flowers and green grass.

I have always been a fan of Bath and Body Works candles. They smell amazing and they burn for a long time.


This new Lemon Cucumber scent is prefect for spring. I have it in my kitchen. it is so light and fresh and clean. I love it!


What scents are you loving?

I hope you all have a fabulous first weekend of spring.


Jen

Wednesday, March 19, 2014

Creamy Balsamic Chicken Linguine

If you love pasta and you love chicken and you are looking for a 20 minute dinner to whip up on a busy day, this is the dish for you!


It is super simple, it tastes AH-MAZING and it took 20 minutes!


What you need,

2 chicken boneless skinless chicken breasts cut into 1 inch pieces
Salt and Pepper
1 tsp. olive oil
½ tsp. dried thyme
½ tsp. seasoning salt
½ tsp. garlic powder
¼ tsp. fresh cracked black pepper
2 tbsp. minced fresh parsley
1 15 oz. jar of Alfredo sauce (I used Classico)
1½ tbsp. Balsamic Vinegar
½ lb. linguine noodles

In a large non-stick skillet heat the oil over medium high heat.

Pat the chicken bites dry with a paper towel and season with salt and pepper. Cook over medium high heat for 5-6 minutes until the chicken is well browned and almost cooked through.
Remove the chicken from the pan and set aside.

Reduce the heat to medium and add the Alfredo sauce to the pan. Stir in the balsamic vinegar, thyme, seasoning salt, garlic powder and fresh cracked pepper.

Meanwhile cook the linguine according to package directions. Drain and set aside.

Add the chicken back to the sauce and stir to coat. Let the chicken simmer in the sauce for 2-3 minutes just until the chicken is cooked through.
Add the linguine to the sauce and toss carefully to coat. Stir in the fresh parsley just before serving.


I served mine with some lovely asparagus with a little butter and lemon, it was a wonderful dinner.

The sauce is so creamy and tangy, pasta perfection!

Jen

Recipe adapted from Lauren’s Latest


Monday, March 17, 2014

“Just Like Mom Used To Make” Tuna Melts

Growing up I was lucky enough to be able to go home for lunch. Our schools were always close enough that we had time to walk home, eat, watch the Flintstones then head back to school.


My mom worked shift work so sometimes my dad made us lunch, sometimes we made our own lunch but when mom was home she made us lunch.
Her tuna melts were always one of my favorites.


What you need,

1 can of flaked tuna in water, drained well
½ can of cream of mushroom soup
1 green onion, sliced thinly
Salt and Pepper to taste
8 slices of Old Cheddar Cheese
2 soft hamburger buns split in half

Heat the oven to 350 degrees.  Lay the bun halves on a sheet pan.

In a bowl combine the tuna, mushroom soup, green onion. Season the mixture to taste with salt and pepper.

Divide the tuna mixture between the bun halves. Top each bun with 2 slices of cheddar cheese.

Bake in the oven for about 10 minutes or so, until the tuna mixture is hot and bubbly and the bun is toasty.

I like to put the melts under the broiler for 2-3 minutes at the end just too really melt that cheese.

Serve with a side salad and you have a perfect lunch.


These tuna melts are still one of my favorite lunches. They are so creamy and perfect.

Thanks Mom!


Jen

Sunday, March 16, 2014

Baileys Irish Cream No-Bake Cheesecakes

Tomorrow is St. Patrick’s Day. While I am not much into the green beer or parties I do always make my favourite Slow Cooker Corned Beef with Cabbage and Potatoes.


I decided to whip up a quick little dessert to finish off dinner. I know it's not green but it does have a bunch of Baileys in it‼ And that is totally Irish, right??


What you need,

1¼ cup Oreo cookie crumbs
¼ cup butter, melted

½ cup semi-sweet chocolate chips
1 8oz. block of cream cheese, softened
1 cup Cool Whip
½ cup Baileys Irish Cream Liquor
2 tsp. vanilla

More Cool Whip and sprinkles for topping

In a small bowl combine the butter and Oreo cookie crumbs. Mix until all the crumbs are moist. 
Divide the crumbs evenly between 4 small bowls. Press them with the back of a spoon to create an even layer.

In a small bowl melt the chocolate chips in the microwave. I like to do 30 second increments on ½ power, stirring often until fully melted.

In a large bowl combine the cream cheese and melted chocolate. With an electric hand mixer beat until the mixture is light and fluffy.
Stir in the Baileys and vanilla until fully incorporated.

Gently fold in the Cool Whip until no streaks remain.
Spoon the mixture over the crumbs in the 4 bowls and smooth off the tops.

Cover the cakes with plastic wrap and store in the refrigerator overnight.
Before serving dollop on a little more Cool Whip and shake on some green sprinkles, it is St. Patrick’s Day after all‼


These simple little desserts are amazing! You will love them.

Happy St. Paddy’s Day!

Jen

Recipe adapted from Eat Drink Love


Friday, March 14, 2014

Favourite Things Friday Vol 68 – Rubber Spatulas

I have 8 rubber spatulas… 8‼ Thank goodness I don’t have 10 otherwise it might mean I have an actual problem!


This blue one is my go to spatula. I grab it first for most things. This is actually my second one, I broke the first one a few years ago so I had to go out and find one exactly like it to replace it!


These two little ones are great for small jars or getting peanut butter out of measuring cups. I use them a lot too.


These 2 little cuties I just got a few weeks ago. I just love them!


Every time I see a cute one in a store I have to talk myself out of buying it. Do I really need one with a bunny on it for Easter? Do I really need this red one?? I am sure my obsession will continue.


Hooray for Rubber Spatulas!

Have a fabulous weekend. It is really starting to feel like spring, so I am excited to get out and enjoy it!


Jen

Wednesday, March 12, 2014

Cheeseburger Stuffed Twice Baked Potatoes


Who doesn’t love a cheeseburger?? Well here is a great twist for you, take that delicious cheeseburger and stuff it into a baked potato.
UHHH YUM!


These potatoes were so good. You make the filling then add a homemade cheese sauce to it, spoon it into soft fluffy baked potatoes, add more cheese and bake again until they are bubbly and crisp.
TO DIE FOR‼


What you need,

For the filling,
½ lb. lean ground beef
¼ cup onion, finely diced
1 tsp. Worcestershire Sauce
2 tbsp. yellow mustard
4 tbsp. ketchup
2 tbsp. dill relish
Salt and Pepper to taste

For the cheese sauce,
2 tsp. butter
2 tsp. all-purpose flour
¼ tsp. salt
1/8 tsp. black pepper
½ cup milk (I used 1% because it is what I had)
8 cheese slices, chopped

4 medium Idaho or Russet potatoes
2 cheese slices for topping

Start by baking your potatoes. Heat your oven to 350 degrees.
Rub the potatoes with a little oil and sprinkle with a little salt and pepper. Poke each potatoes a few times with a sharp knife.

Place right on the rack in the middle of the oven and cook for 1 hour, or until the potatoes are tender. Depending on how big your potatoes are you may need to cook them longer.

When they are cooked through remove them from the oven and place on a cooling rack until they are cool enough to handle.

Cut roughly the top 1/3 off each potato. Scoop out the flesh leaving about ¼ inch shell. Be careful not to go all the way through.

To make the cheese sauce, melt the butter in a medium sauce pan over medium heat. Stir in the flour and cook for 1-2 minutes until it is light golden brown and bubbly. Stir in the milk and continue to cook for about 5 minutes until the sauce thickens. Season the sauce with salt and pepper. Turn the heat to low and gradually stir in the cheese until it has all melted.

Meanwhile make the filling. In a large skillet brown the beef over medium high heat until well browned and cooked through. Drain off any excess fat.

Stir in the Worcestershire sauce, mustard, ketchup and dill relish. Season the beef mixture with salt and pepper to taste. Stir the cheese sauce into the beef mixture until well combined.

Place the potato shells on a baking sheet. Fill each shell with the beef/cheese mixture.
Top with ½ of a cheese slice.

Bake in a 350 degree oven for 45 minutes, until brown and bubbly.

Serve with a nice side salad and you have a perfect dinner.


The filling really does taste like a cheeseburger, and the homemade cheese sauce is sooooo good.

I loved the baked potato but you could easily spoon the mixture over a toasted bun and it would be just as good.

Enjoy!


Jen


Recipe adapted from Key Ingredient

Monday, March 10, 2014

Lemon Poppy Seed Muffins

My in house taste tester was working on a very big project at work last week. His whole team had to be at work starting at 4am! That is just too darn early, in my opinion.


To help ease their pain I whipped up a batch of these tasty Lemon Poppy Seed Muffins.  He took them to work to share around.


They are divine! They have a soft and moist crumb and a nice tart flavor. They really are the perfect muffin.

What you need,

2/3 cup granulated sugar
The zest and juice of 1 large lemon
2 cups all-purpose flour
2 tsp. baking powder
¼ tsp. baking soda
¼ tsp. salt
¾ cup sour cream (or plain Greek yogurt would work too)
2 large eggs
1 tsp. vanilla
½ cup butter, melted and cooled slightly (as usual I used salted butter so I left out the salt)
2 tbsp. poppy seeds

For the icing,
1 cup icing sugar
2-3 tbsp. fresh lemon juice

Heat the oven to 375 degrees. Line a muffin tin with paper liners and set aside.

In a large bowl combine the sugar and lemon zest. Rub the sugar and zest together with your fingers until the sugar is moist and fragrant.
Whisk in the flour, baking powder, baking soda and salt if you are using it.

In a separate bowl stir together the sour cream, eggs, vanilla, lemon juice and butter until well combined.

Add the liquid ingredients to the dry and stir just to combine do not over mix or you will get tough muffins, no one wants that!
Gently fold in the poppy seeds.
Divide the batter evenly into the muffin cups.

Bake for 18-20 minutes, until the tops are golden and a toothpick comes out clean.

Cool the muffins in the tin for 5 minutes then transfer to a wire rack to cool completely.

While the muffins are cooking make the icing. In a bowl stir about 1½ tablespoons of the lemon juice into the icing sugar. Continue adding more lemon juice until you get a thick but still runny icing.

Once the muffins are fully cooled, drizzle the icing over the tops.

Muffins are always best same day but you can store them in an airtight container for 2 days. You can even freeze them for up to a month.


A perfect treat for a group of hungry co-workers.

Enjoy!

Jen